It’s About the Bike
October 14, 2007 at 7:36 pm · Filed under Identity / Systems, Industrial / Product, Type / Fonts
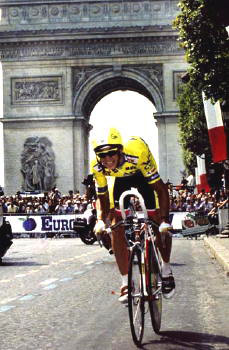
The ultimate inspiration: Greg LeMond (here on his way to winning the 1989 Tour de France). photo by Cor Vos
I’ve always been interested in cycling to some extent. I always rode bikes, and even before my teens, I watched big races like the Tour de France when they were on TV, and I spent my fair share of time staring at the top shelves of local bike shops and fogging up their display cases. This—unlike most—was an interest that grew steadily stronger with age. But it was an ironic turn of events that launched me into a full-blown obsession with cycling: I got hit by a car while riding my bike.
I was commuting to high school sophomore year on my Specialized CrossRoads Cruz hybrid bike (about $250 new, then) and, as I rode across a busy intersection, I was struck by a Volkswagen Scirocco (one of my favorite cars at the time), whose driver had run a red light in the rush of the hour. The impact instantly broke both of the bones in my lower left leg (although I didn’t realize this until I tried—and failed—to walk away from the scene). It’s said that people can’t recall the actual sensation of pain, but I can say with absolute certainty that having to move my broken leg into several different positions on the X-Ray table later that day was the most excruciatingly painful experience of my life. The breaks also ran perilously close to the bones’ growth plates and, if they had been damaged, this situation would have been even worse, as I still had a good six or seven inches to grow. This was not the last time that I would get hit by a car, and it’s not an experience that I would recommend to anyone, but there is usually one considerable upside: the insurance settlement. On top of paying for all of my medical bills, the sum allowed for the purchase of my first bona-fide road-racing bike: a Cannondale R900 (about $1,800 new, then).
Since they are so expensive and complex (especially compared to, say, a basketball), just getting a good bike can be a hurdle high enough to trip up a considerable percentage of potential racers and enthusiasts. Clearing this hurdle allowed me to start racing, and it was also a huge factor in the procurement of my job at a prominent local bike shop. By the time I hit senior year, I was in cycling up to my eyeballs. I rode everywhere, all the time; I was on a team; I raced as often as possible (about 50 – 60 races per year); I worked on bikes with other racers and cycling aficionados at the shop; I read every magazine and brochure cover-to-cover; I watched video tapes of every European road race fit to be filmed; I went to bike shows and bike parties… Cycling had basically permeated every aspect of my life. It didn’t take me long, then, to figure out what I was going to do for my high school Senior Project.
The parameters of this assignment were relatively broad and simple: write something, do some community service, or create some kind of artwork. The project was to take at least 40 hours (all outside of school), and it would count for approximately half of that year’s grade for my two most important classes. The goal was equally simple and daunting, as laid out by my professor—a quite scholarly Scott who had been a quadruple-major university graduate, among many other improbable accomplishments: “Impress me.” I figured that there was no way I was going to impress anyone without at least impressing myself, and the most impressive thing I could think of was to build a bike…
I had some ideas about what I wanted to create, based on a mix of my own pragmatic and fantastical parameters. I wanted the frame to build into a time-trial (TT) bike—for two reasons: For one, these bikes seem cool, or at least somewhat intriguing, to just about anyone, whether they are generally into bikes or not (TT bikes were commonly known at the time as “funny bikes” because they looked so out-of-this-world). I also didn’t have a TT bike already, and I figured that I may as well try to impress my racer friends, too, by actually competing on the finished product. I wanted to build the frame out of steel tubing, the most time-honored frame material, and also the easiest material to work with. And, as ever, I wanted it to be over the top.
I came up with many potential designs for the frame and how it would be built up, considering various themes and available components. In order to go over the top with any project, it’s often best to set a baseline, so I started with this relatively restrained option, with more common, practical Shimano components and Specialized tri-spoke wheels (now known as HED3 wheels) and a very traditional paint scheme:
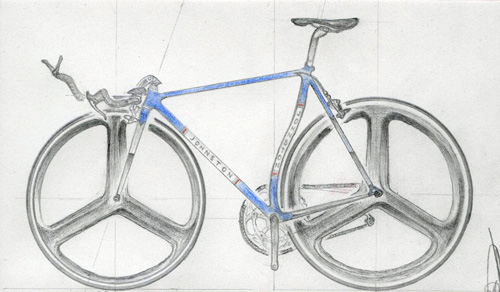
TT bike design sketch / 1995
Then, I went to the other end of the spectrum, and designed a few completely unfeasible concepts, including these:
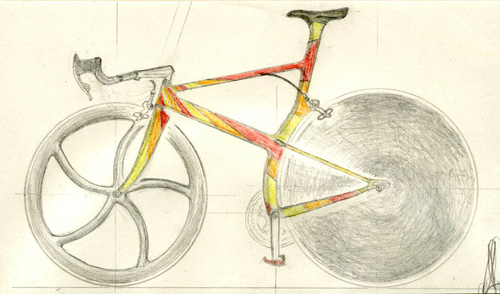
TT bike design sketch / 1995: fillet-brazed steel frame, Campagnolo Record components, FIR wheels. (To my surprise, Evgeni Berzin would ride a Bianchi built just like this in the following Tour de France)
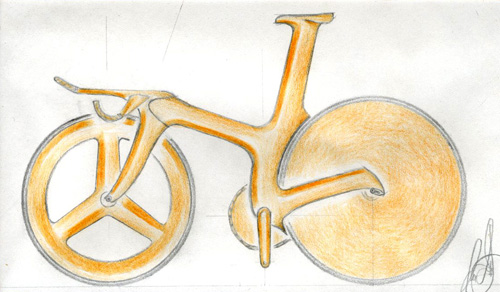
TT bike design sketch / 1995: This is really more of a pursuit bike for the track, inspired by Chris Boardman’s Lotus Superbike; carbon fiber monocoque construction; custom components and wheels
Somewhere in the middle of this spectrum was the all-Italian version, dressed in red, white, and green, and fitted with 100% Campagnolo madness, including the absurd Scirocco front-only disc wheel that had four giant, limb-threatening holes:

TT bike design sketch / 1995
In the end, I decided on this American and French affair:
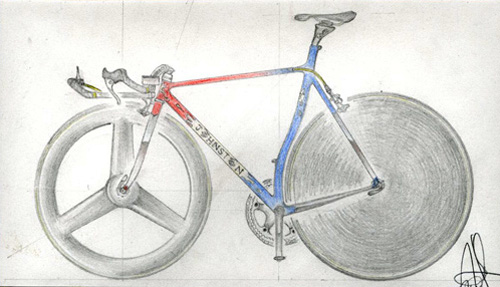
TT bike design sketch / 1995
The frame was to be built with U.S.-sourced True Temper Aero Velo tubing, which featured several airfoil-section pieces, including the down tube, seat stays and seat tube, which also hugged the curve around the rear wheel—all for cool looks (Oh, and it may have made the bike about 2% more aerodynamic, too). The tubes would be fillet-brazed together, partially chromed, and otherwise painted red, white, and blue, with my own custom graphics, marks, and logos. The finished frame would be built up with SSC components from the esoteric French manufacturer, Mavic. The wheels, too, would come from Mavic: the 3G trispoke front and the physicist-baffling Comete +/- rear disc, in which you could actually add or subtract custom weights depending on the course, supposedly maximizing potential gyroscopic momentum. And yes, the two wheels actually are different sizes (on purpose). Coincidentally, most of of these elements were in common with the bike that the American LeMond piloted in his incredible comeback-victory ride into Paris in the 1989 Tour de France (referenced at the top of this post).
Being in the bike scene, I already knew several local frame-builders, so I began my research with regard to actually fabricating my design by talking to them. One suggested I read a book called “Designing and Building Your Own Frameset” by Richard P. Talbot, so I did.
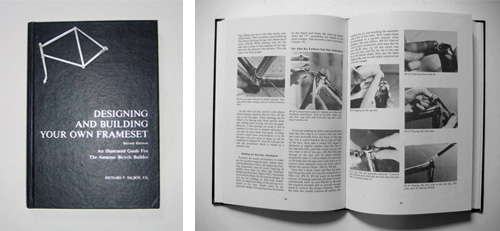
an incredible story
This book is quite inspirational, as the author, an engineer with no prior frame-building experience, researches, designs, builds, hand-letters, and paints his own frameset, and assembles it into a very handsome final product. And, he does it all in his garage or his back yard with little more than common hand tools and home-made wooden jigs. (Even the most modest professional frame-builder has a formidable workshop with at least $10,000 worth of specialized jigs and tools.) He then documents the entire process with remarkably-detailed and well-written explanations and excellent photographs (that he took, himself). I have never heard of anyone actually following Talbot’s book to duplicate his feat, but, theoretically, one could. I decided that I probably couldn’t. My next option was to go back to the frame-builders and have one of them teach me, directly, in their shop. Luckily, Dave Levy (a fellow racer and proprietor of TiCycles) offered such a class.
A professional frame-builder is supposed to be able to construct a standard, steel frame in 20 hours, and a good mechanic (which I was at the time) can assemble a complete bike from frame and parts in less than an hour. That would leave about 19 hours left on the project clock, which I was genuinely worried about. This particular point of worry was, of course, completely unwarranted. Ironically, I hadn’t even considered the research and design phases, which had probably covered the other 19 and then some before I laid a hand on any metal. More to the point, I was not a professional frame-builder, and this was not a standard frame. The combination of irregular geometry at every junction, oddly-shaped tubes, fussy details like internal cable routing, and the choice to fillet-braze everything together – the most elegant and sculptural but painstaking method of frame-construction – all added up to so many hours that my real worry became whether I was going to be able to finish it on time. (I had started the project at least eight months before it was to be presented.)
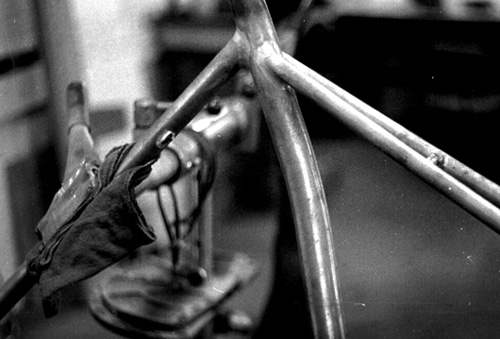
Here is a shot of the seat cluster area as the frame is being built. Notice the fillets around the joints, which have to be filed and sanded by hand into perfectly smooth radii between the different tube shapes. You can also see the outlet for the internal rear brake cable routing.
Dave’s class ended up being a great experience, even if he did advise me to make a couple minor design changes that I would later regret allowing. Overall, he spent a lot of time showing and teaching me every aspect of the process, and the frame turned out well.
Once it was constructed and the fork and the rear stays were chromed, it was passed to a local painter. I had designed custom decals of my monogram mark to be used as head tube and seat-tube badges, as well as horrendous custom type for my down tube logos in which two glaring eyes took the place of the “O”s in “Johnston,” all of which I had rendered in a less-than-optimal outline execution (as if the eyes weren’t crazy-looking enough). These decals were to rest on “splash”-style white backgrounds that I had hand-cut from adhesive vinyl (this treatment, in combination with they eyes, gave either the impression of crying or immense perspiration; either way, it was expressive). I gave all of this, with detailed sketches for reference, to the painter and two weeks later—Voila! It was almost, but not quite right. He actually called me in to apply the big down tube decal because he was skeptical of his own chances with it, so that came out okay, and the paint didn’t start chipping for at least a month, but, for some reason, he put both of my monogram decals on at a 45º angle. That didn’t please me, but at least it was consistent, and I got over it.
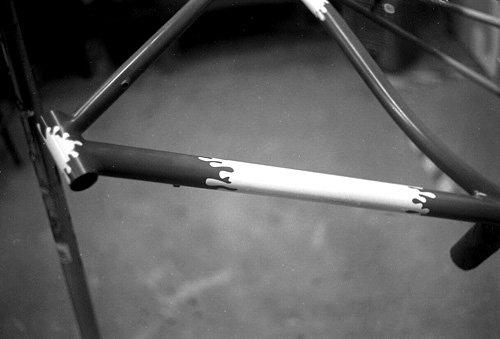
the frame with red and blue paint and splash graphics applied, ready for monogram badges and logos and clearcoat
the head tube splash graphic
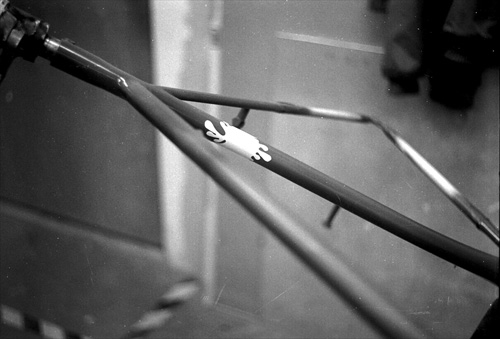
the matching seat tube graphic
Back from the painter, it was now time to take it to the shop where I worked so I could build it up with all of my specially-imported Mavic components (almost all of them had been discontinued, so getting new old stock was neither easy nor inexpensive).
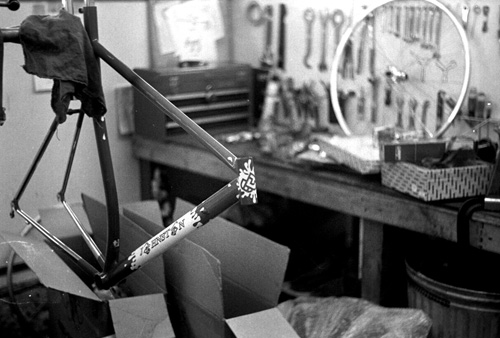
the finished frame, ready to build up into a bike / 1996
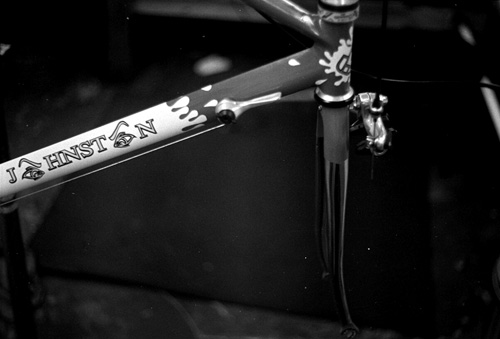
a sight for sore eyes
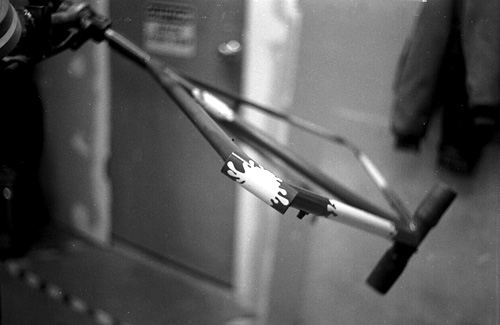
Needless to say, it took me well over an hour to build this thing; I think it was more like a week or two. Aside from the usual prep-work – like chasing the bottom bracket threads, facing the head tube, brushing the seat tube barrel, and and sealing the frame against internal water damage – there was a lot of custom machining that I had to take care of, like drilling out the handlebars for aerodynamic brake cable routing, filing down the rear shifter mount to curve around the aero-section down tube, and sawing down the seatpost so it could sink low enough into the frame before hitting the curve in the seat tube. The most difficult, time-intensive, and, frankly, terrifying stage of the whole building process, though, was having to wrestle and glue claw-tight sew-up tires onto the world’s most ridiculously expensive, delicate, and practically-irreplaceable wheelset.
Somehow, I did finish the bike on time, and the end result was pretty gratifying. I even had time to ride it and do a few races on it before the deadline. I even won a race on it. But I knew that I would have to clinch the unveiling to really impress my colleagues and professors. And, yes, I do mean unveiling. In all the years of the class and the project, there had never been anyone else who had held their cards so close. I had filled the room with such baffling vagueness at every obligatory status check-in throughout the school-year that nobody had much of a clue as to what my project actually was. I even pulled a white sheet from the bike at my presentation. I also had a time trial video playing, and I was wearing a skinsuit for the entire show (If you don’t know what a skinsuit is, the name is a dead giveaway). Now that’s showmanship! The presentation worked, people were impressed, babies were kissed, and so on…
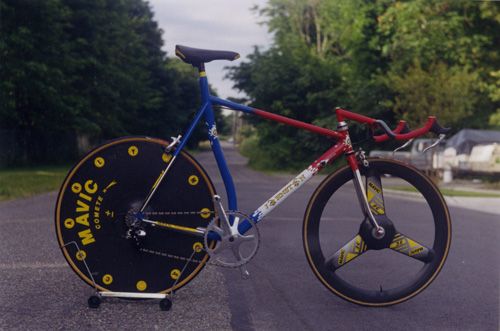
the final Johnston Time Trial bike / 1996
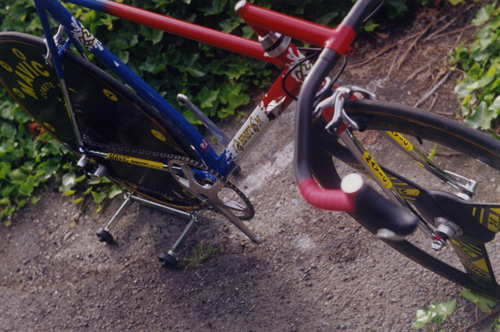
a closer look
This is how I was hoping my competition would remember it.
Now, if you’ve gotten this far, you’re probably dying to know the real results: how I fared in relation to my classmates, and what grade I got. Well, to be honest, the only other project I even remember was Noah’s, who had committed himself to saving women, children, and furry animals from burning buildings as a volunteer fire-fighter for the better part of a year, but I’m pretty sure that dude was actually Jesus Christ reincarnated (nobody could humanly be as pure and good at everything as Noah). Taking Him out of the running, I’ll just go ahead and say mine was the best.
And, for all the number-crunchers out there, I ended up getting a 3.9. Why not a perfect 4.0? My project didn’t actually fit into any of the three designated categories for the assignment.

Design, build…your own frameset « Rock’n'Rollin Fixie Riders Club said,
November 23, 2008 at 8:09 am
Design, build…your own frameset « Rock’n’Rollin Fixie Riders Club
mkubee said,
February 21, 2009 at 2:05 am
How in the world did I get here?
No matter… a pretty interesting tale, I don’t know anyone in high school that had that much initiative to actually design their own bike — although I did make a fine mouse trap car back in the day — and I do recall a guy that had a very interesting ‘project’ on ‘how to use smack’ with pictures with him demonstrating and everything, which was not so much interesting because of content, but reaction — everyone just sat there in a daze and learned the proper way to shoot heroin(I do believe he had to have a little chat with the teach after that though)– anyway, I was wondering how you were going to fulfill the community service bit of your project … and save the world on that bike… all explained though — 3.9… touche.
Daniel P. Johnston said,
March 1, 2009 at 12:25 pm
Thanks for the comment, mkubee. We clearly went to different high schools, although it sounds like your mate put on a hell of a show. Presentation is everything.